Simple Homemade Injera (Ethiopian Flatbread)
A pandemic silver lining

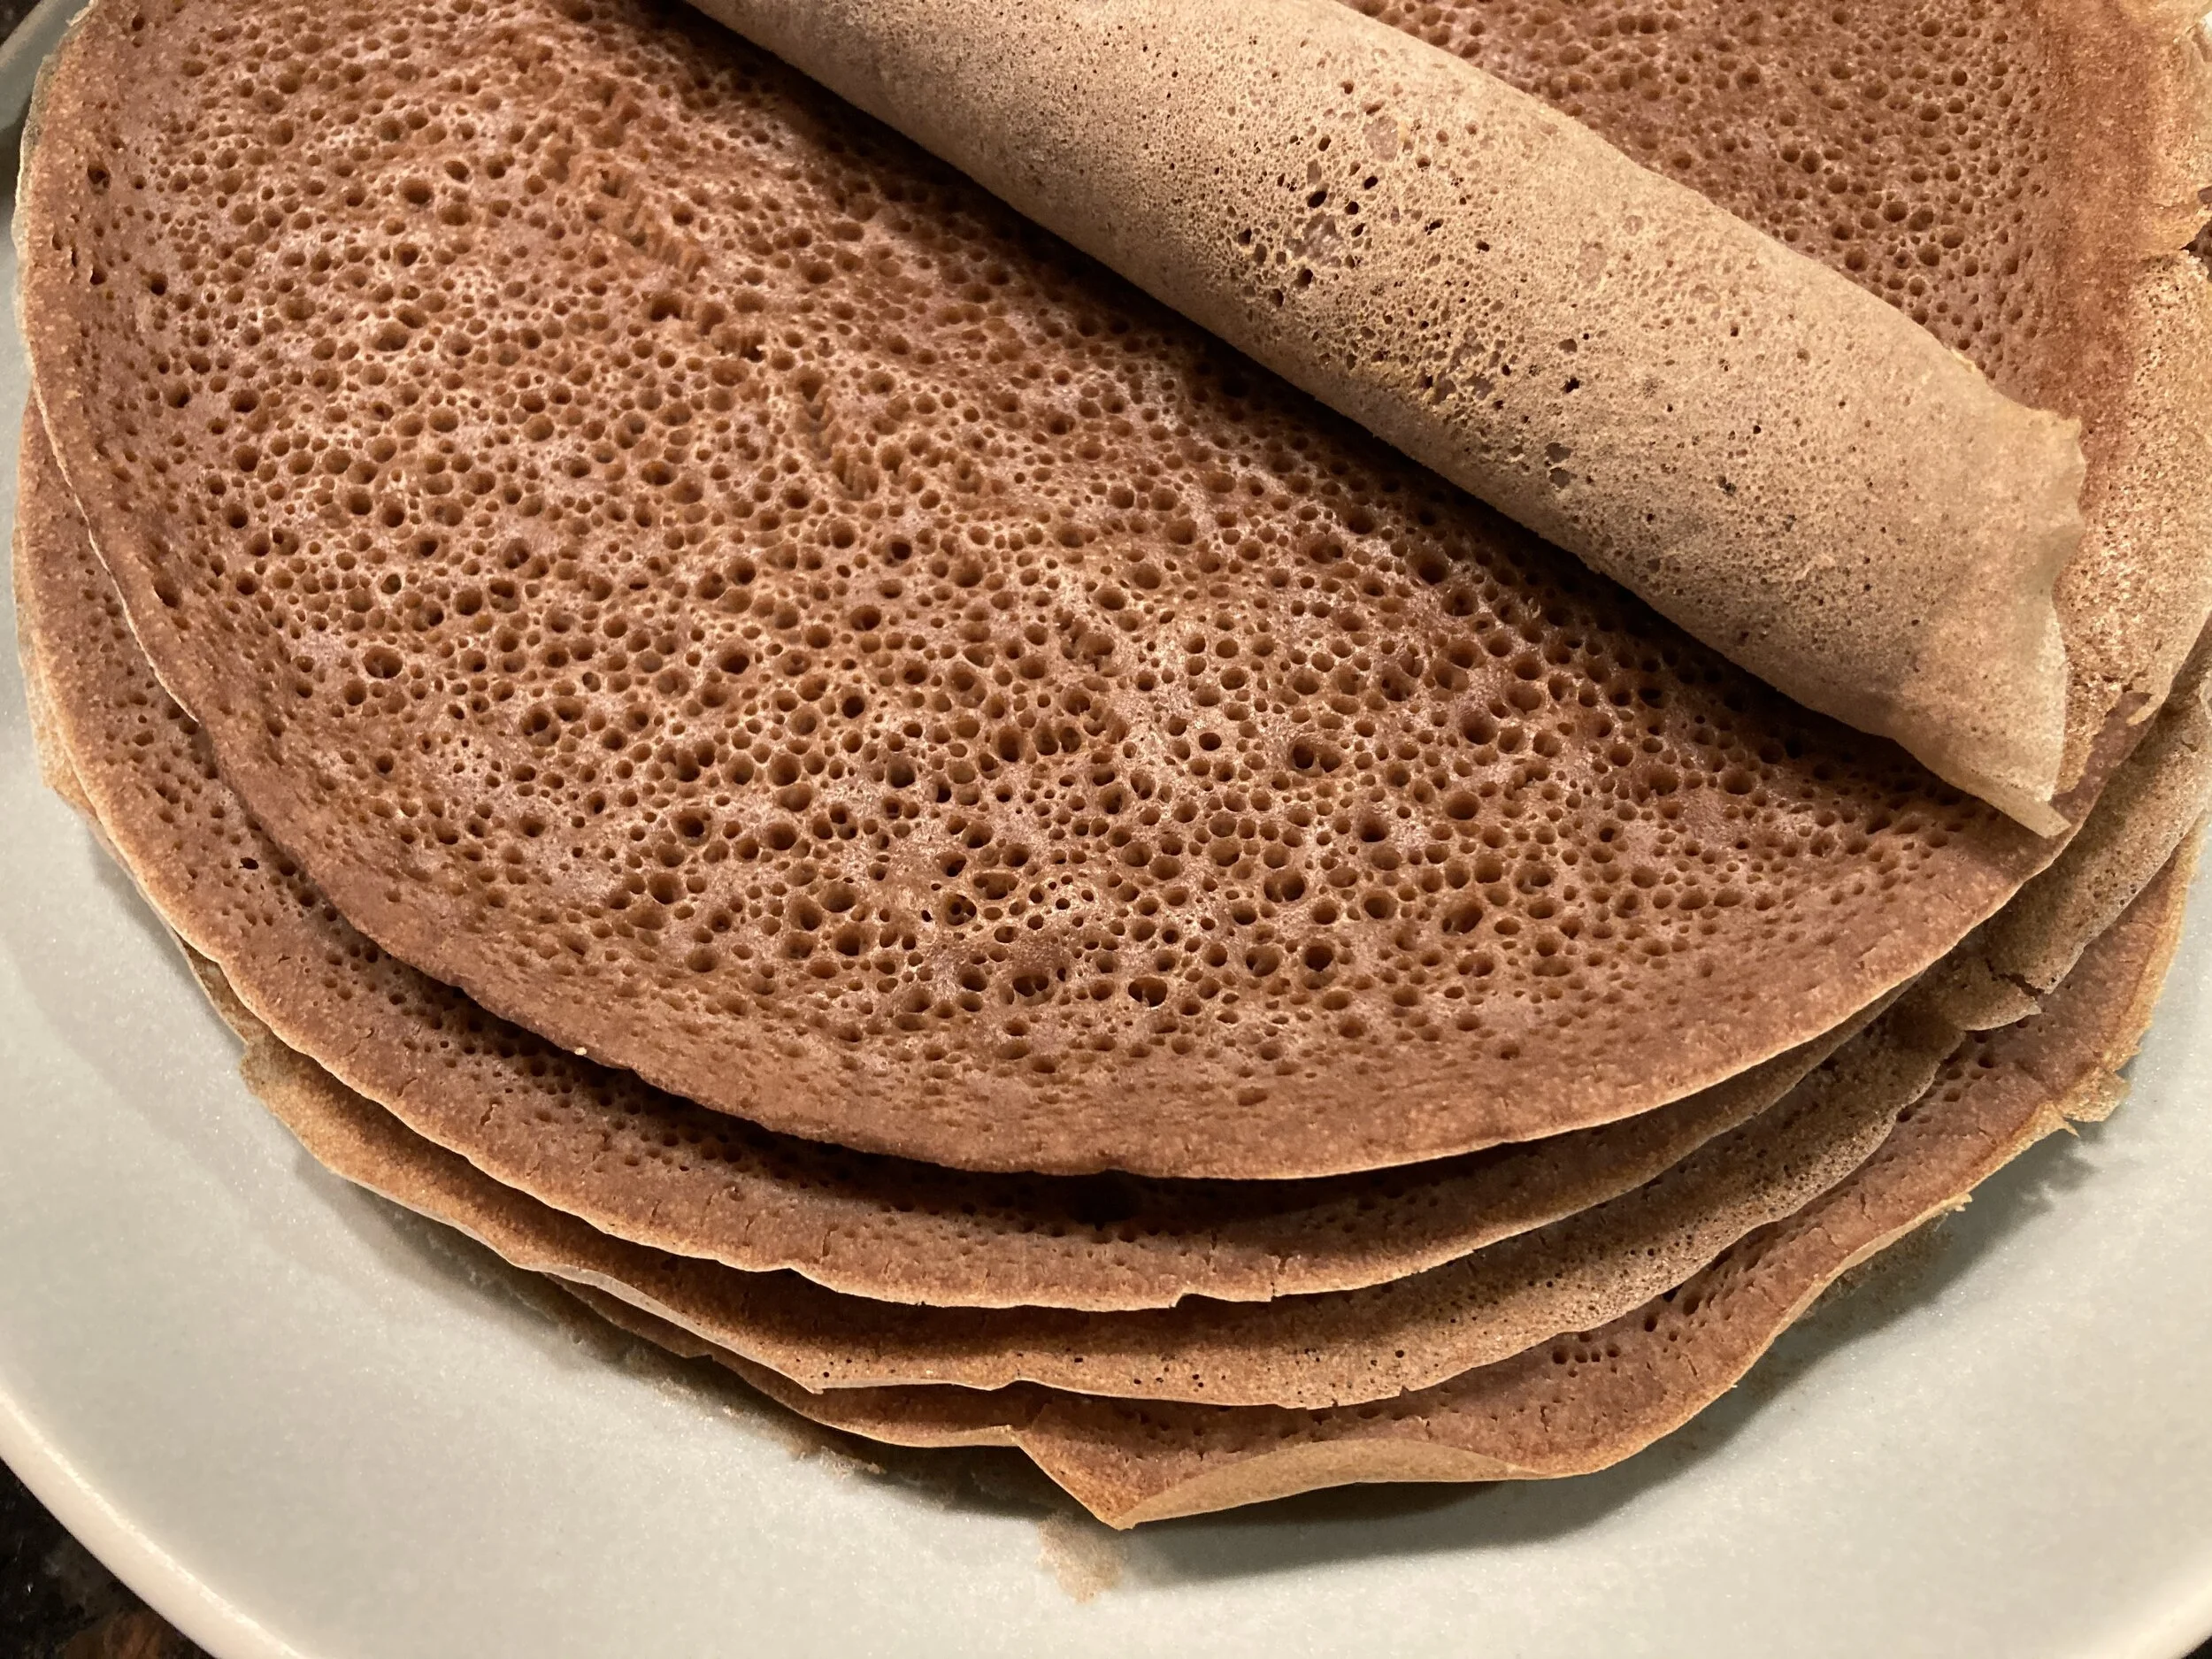
Eritrean and Ethiopian cooking is amazing. Until recently, I had only eaten it in Bay Area and Washington D.C. restaurants, and I’d never thought to make it myself until the coronavirus put the kibosh on restaurant-going in general. I was thrilled to learn this summer that many of the traditional dishes I love are very quick and simple to prepare, and require no unusual ingredients. But to me, you’re not really eating Ethiopian food unless you’re eating it on injera – the deliciously tangy, spongy teff flatbread that serves as plate, platter and utensil. And it turns out, injera usually isn’t quick or easy to make.
There are links below to products I recommend. As an Amazon Associate, I may earn a commission (at no additional expense to you) from qualifying purchases.
Teff is a tiny (poppy seed-sized) East African grain that’s deliciously nutty and earthy with cocoa undertones — it’s also, gluten-free and very high in iron, calcium, protein and fiber. According to Yohanis Gebreyesus, author of the outstanding Ethiopia: Recipes and Traditions from the Horn of Africa, this grain is so essential to Ethiopia’s food supply that the government prohibits its export in grain form. Any whole teff you see in the store is grown elsewhere; Bob’s Red Mill offers whole-grain teff that’s grown in the U.S.
You can easily buy teff flour online (this link is for my go-to brand), so that part of injera-making was a cinch. But when I went looking for injera-making advice, I discovered that everyone I know who’s lived or visited this part of the world has never made it. And they all told me nobody in Ethiopia or Eritrea makes their own injera – they just buy it from the store. Apparently, most Ethiopian restaurants in the U.S. do the same.
To judge from the descriptions in Gebreyesus’s book, I suspect this is because traditional injera making methods are incredibly time-consuming and require many steps over the course of almost a week. I gave the traditional method a shot, but concluded I have neither the patience nor the fermentation skillz to master that craft. Fortunately, I did hit on a simple way to pull off a mostly authentic injera with minimal effort, and no prior sourdough expertise. If you’ve ever made crêpes, you can make this injera recipe.
There is no substitute for slow-fermented injera that tastes anything like the real deal.
I tried a bunch of different things to try to make an instant version (using club soda, buttermilk, vinegar, etc.) but none of these ersatz editions scratched the injera itch. They all lack injera’s signature light springy texture, and distinctive sour tang. So, this much-simplified recipe still involves a couple of days of fermentation, but it’s all inactive time — all you have to do is gawk at the natural yeasts working their magic. The total active cooking time here is less than half an hour.
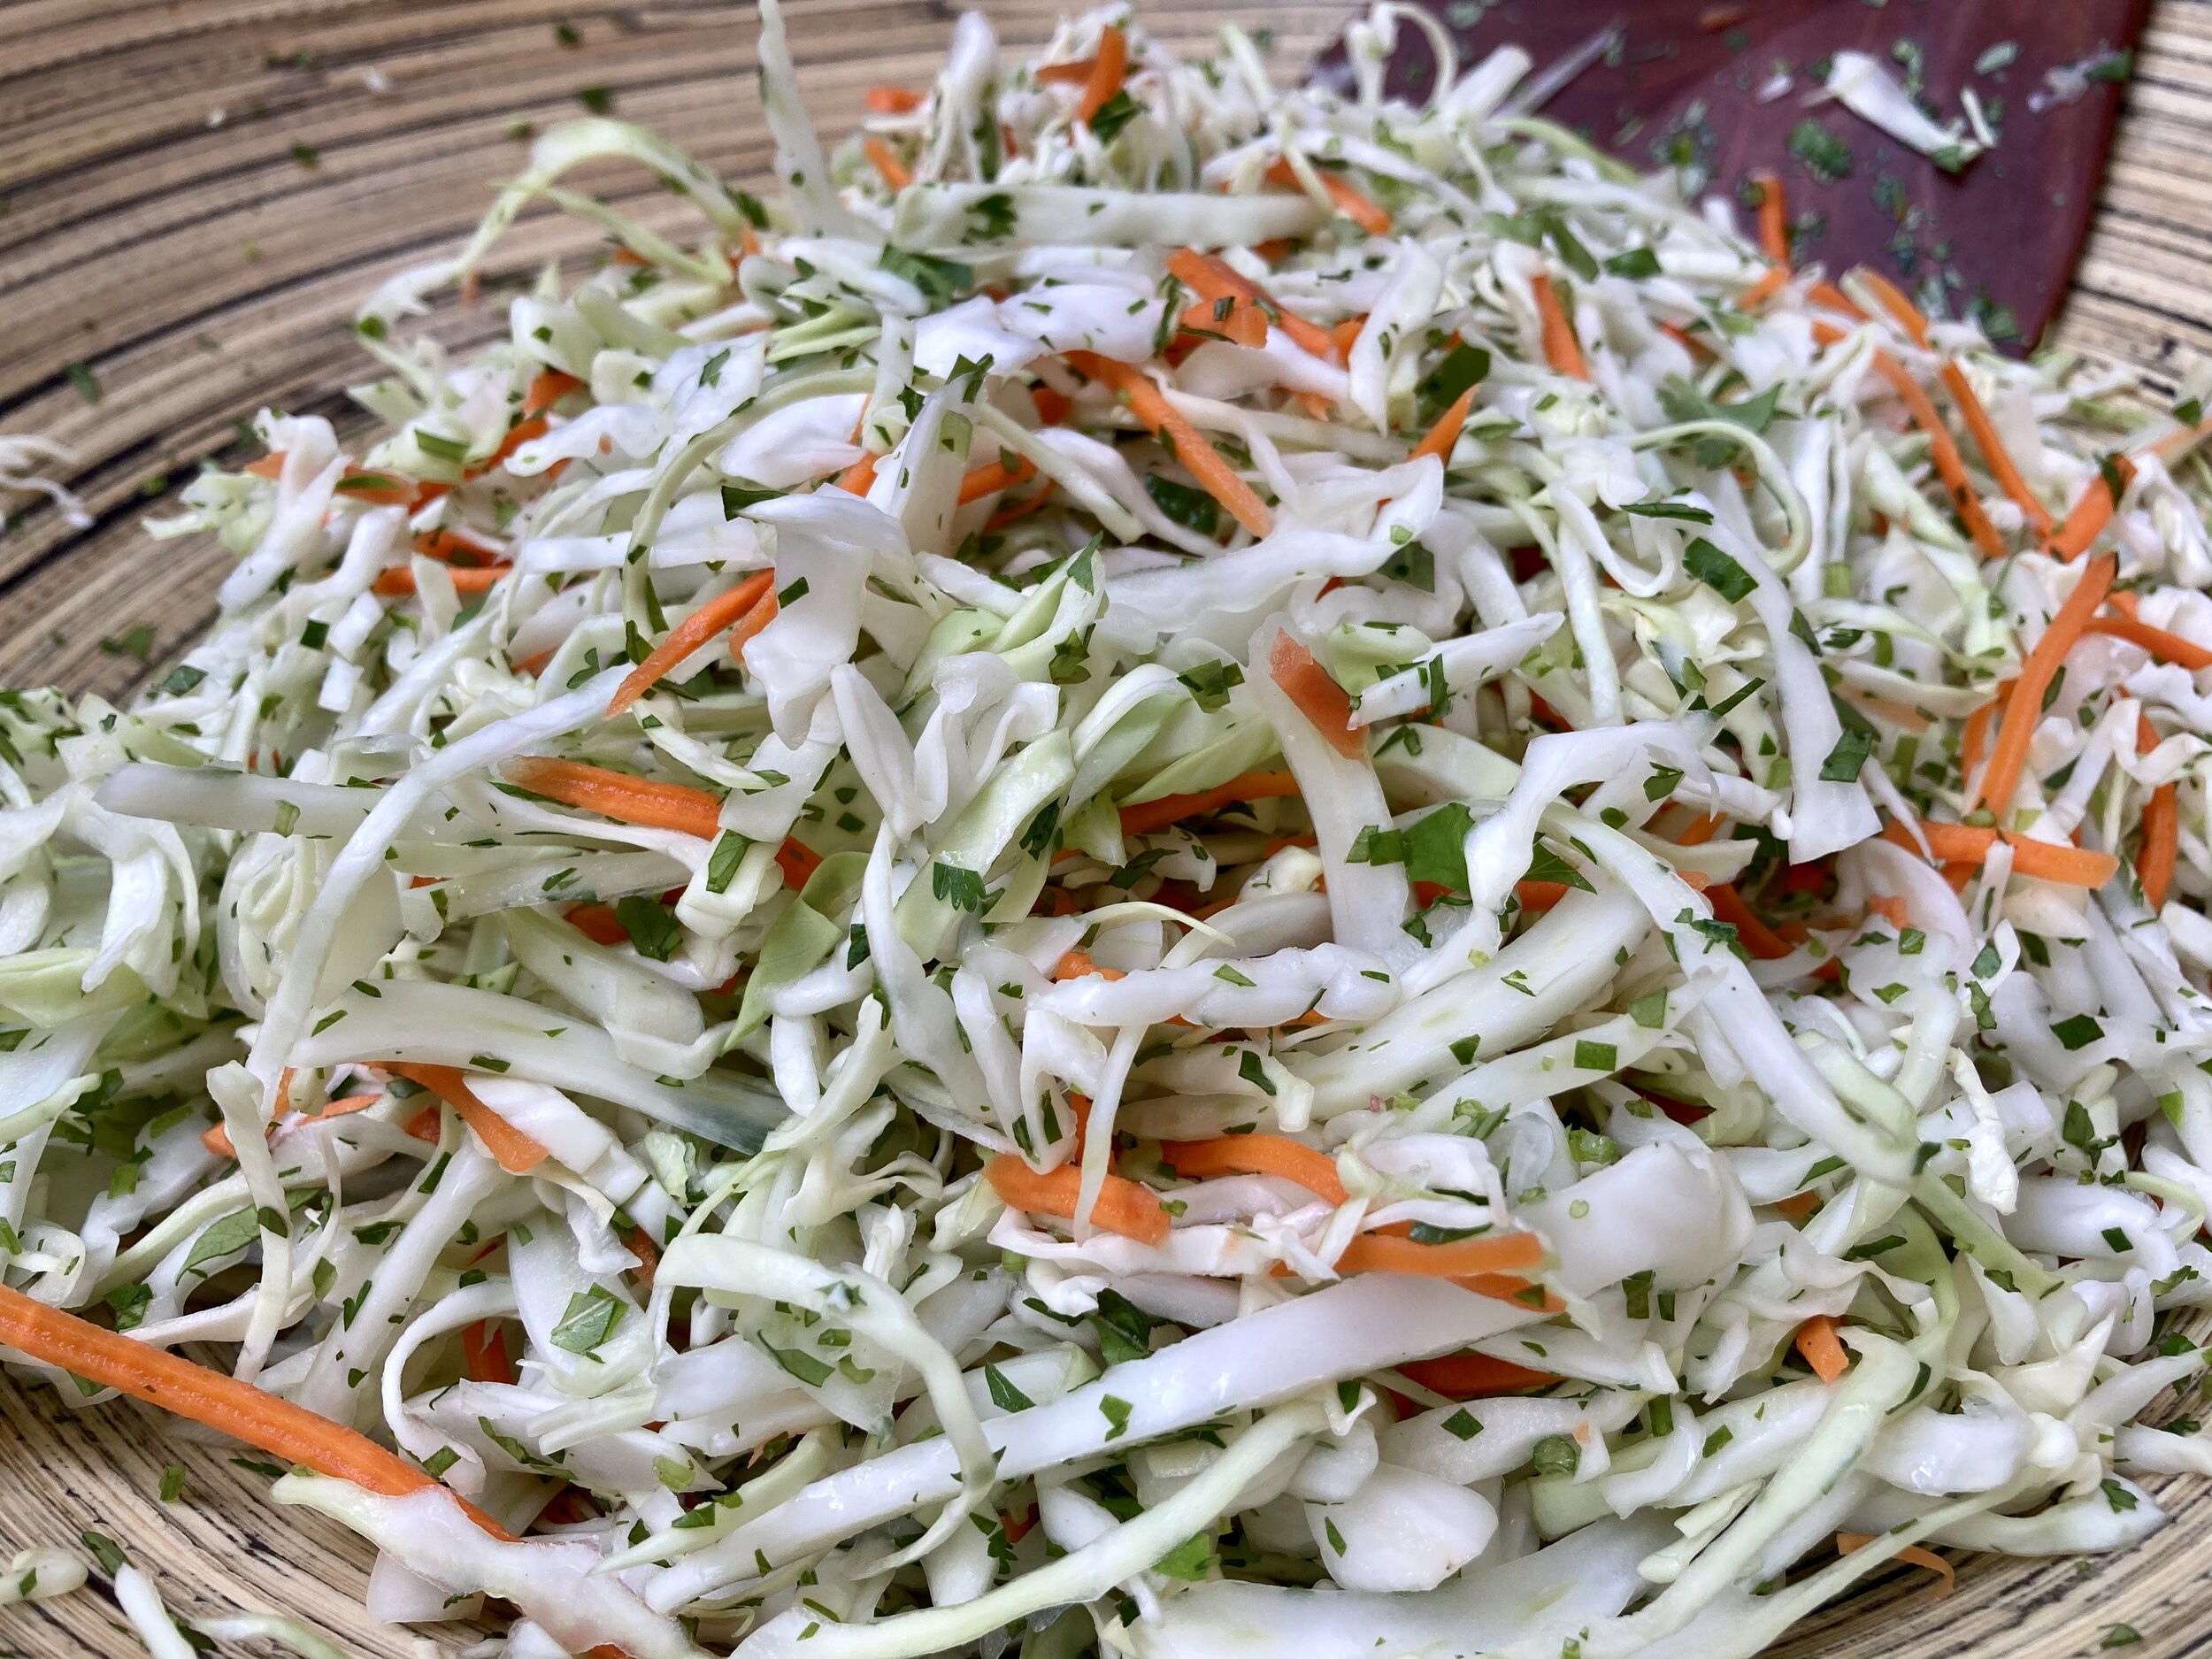
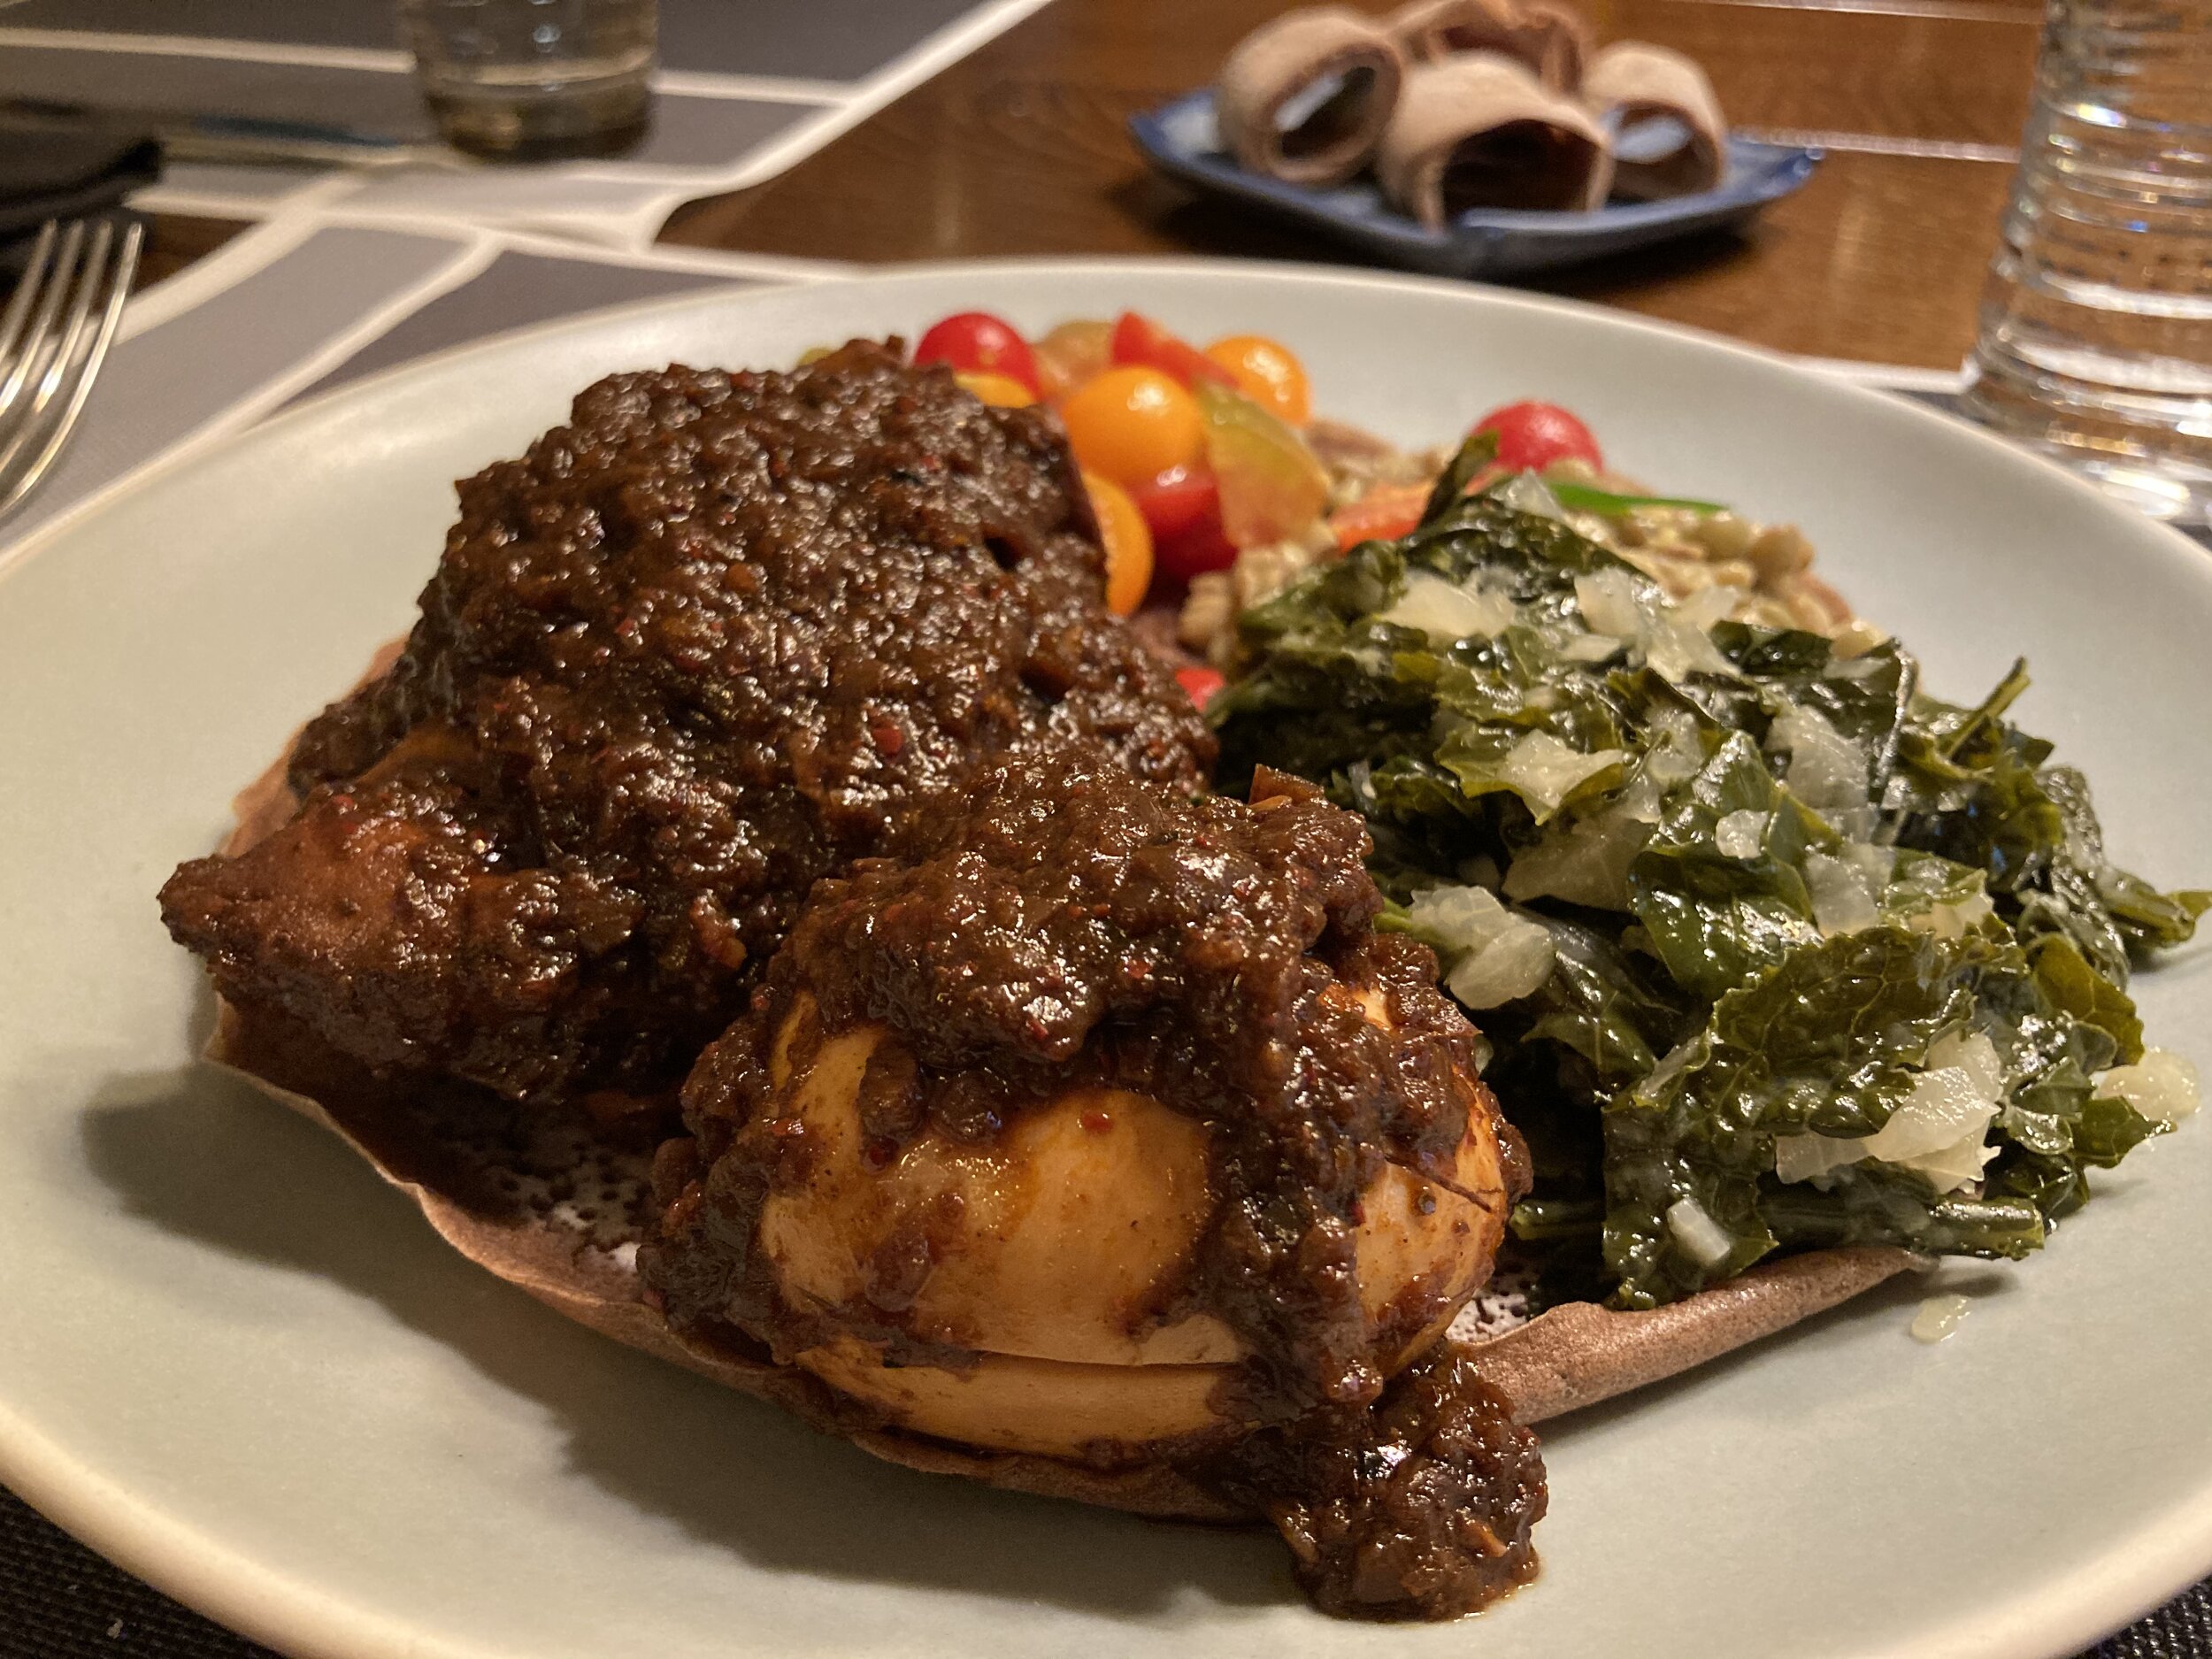
My favorite way to eat injera is loaded with doro wat (spicy chicken stew), kik alicha (gingery yellow split peas), gomen (braised greens with onion and ginger), azifa (cold green lentil salad with mustard) and something fresh, tangy and juicy tossed with grated ginger and olive oil (in summer, tomatoes; in winter, try kiwi!). Injera looooves a rich, saucy topping or stew.

Clockwise from the top: kik alicha, gomen, tomato-ginger salad, doro wat, azifa. And hard-boiled egg seasoned with berbere spice.
Since it’s a staple food in Ethiopia, injera shows up in countless other traditional recipes, from salads and stews to snacks like katenga — fresh injera spread with generous amounts of niter kibbeh (the AMAZING spiced clarified butter that’s also a staple of Ethiopian kitchens) and fiery berbere spice, warmed on the griddle until the butter soaks through, and the bottom crisps up. Much like a French crêpe or galette, you fold it up before biting into hot, buttery bliss.
But I also love using leftover injera to make everyday sandwich wraps, spread with hummus or your favorite dip, and whatever soft veggie and/or meat fillings you’ve got in the fridge (don’t use stuff with sharp edges because they’ll poke through the injera). You could also melt cheese on these, and top with ham and a fried egg, French buckwheat galette style.
Do you have a favorite way to eat injera? You will soon.
Semi-Authentic 100% Teff Injera (Ethiopian Flatbread)
Makes 7 or 8 eight-inch rounds (about 5-6 servings)
The authentic part of this recipe is the natural fermentation of pure teff flour over four days; the non-authentic part is using baking powder to achieve blissfully soft, springy injera in seconds instead of hours. The only challenge with baking powder is that its leavening powers are fleeting – they grow weaker the longer the batter sits uncooked, and the more you stir it. Once you add the baking powder to your batter, it’s go time. You have to power through the cooking portion as quickly as possible. If you notice your injera starting to look leathery, with fewer bubbles on top, you probably want to add a pinch or two more baking powder to the batter to keep the rest airy and light.
2 cups (280g) teff flour
3 ¾ cups filtered water, separated
½ tsp kosher sea salt
1 tsp baking powder
Four Days of Fermenting
Whisk together the teff flour and 3 cups of the filtered water in a large, non-reactive mixing bowl until blended. Cover the bowl tightly with plastic wrap, and let the batter sit at room temperature for 4 days. Do not stir the batter while it’s fermenting. (If you see mold developing, don’t freak out. Just scoop it up carefully with a spoon and discard.)

Day 1 of injera making. Natural yeasts in the teff flour do all the work.

Day 3. DO NOT FEAR THE FERMENT.

Day 4. Ready to drain and refresh!
Drain and Refresh
On Day 4, uncover the batter and carefully scoop out any mold that may have shown up while you weren’t looking. Pour off and discard all the water on top, and anything floating on the water. Stop pouring only when the clay-like part of the batter reaches the lip of the bowl. Add ½ tsp kosher sea salt, and ½ - ¾ cup fresh filtered water, and whisk well to combine. You want the consistency of thin pancake batter, so adjust the water amount as needed.
Get the Texture Right
When you’re ready to cook your injera, grab a clean and dry kitchen towel, and preheat a 10” non-stick skillet to medium heat. While the pan is heating, whisk the batter again, then whisk in 1 tsp of baking powder just until incorporated. It should bubble up a bit. Cook 1 Tbsp of the batter to test the texture. The injera should be fluffy and spongy with lots of air bubbles.
If your test injera stays thick and smooth like a regular pancake, add 1-2 tablespoons more water and ¼ tsp more baking powder; if it’s gummy and turns into a cracked desert landscape as it cooks, add 2 teaspoons more teff flour and ¼ tsp more baking powder. (Try not to stir the batter too much in this process, or you’ll lose the benefit of the baking powder and have to add more.) Cook another 1 Tbsp test batch to make sure you’ve got the texture right.
Cook Your (Teff) Crêpes
Once you’re satisfied with the batter, ladle ⅓ cup of the batter into the skillet and immediately swirl the pan to coat the bottom evenly with the batter – just like a crepe. Cook uncovered for 20 seconds, or until the edges are showing dark spots (burst bubbles), then cover the skillet tightly with a lid – ideally a glass one, so you can watch what’s happening. Check out this video of what to expect in those 20 seconds before you cover the pan:

Now, let the injera steam with the lid on until the top surface has bubbled all over and steamed through, usually about 60-90 seconds. You’ll need to quickly remove the lid and wipe off the condensation with your clean kitchen towel every 45 seconds or so (otherwise it drips down and ruins the texture on top); return the lid to the pan as quickly as possible. When the top of the injera is steamed through, use a non-stick-safe spatula to loosen the edges, and transfer the injera to a plate.
Repeat with the remaining batter until it’s all gone. It’s usually fine to stack the cooked injera one on top of the other, but if you notice them sticking, use parchment paper in between the layers.

If you notice three-quarters of the way through that your injera are starting to look leathery, with fewer bubbles on top, you probably want to add a pinch or two more baking powder to the batter to keep the rest airy and light.
Serving and Storing
Serve your injera warm or at room temp. If you’re making these more than an hour ahead, let the injera cool to room temperature before storing in a Ziploc bag with a dry paper towel to absorb excess moisture. Keep in the fridge if storing overnight, and just microwave briefly to warm up before serving.

I love a good rosé with Ethiopian food (this one is by Tavel), but tej — fermented honey wine — would be a more authentic beverage pairing.